
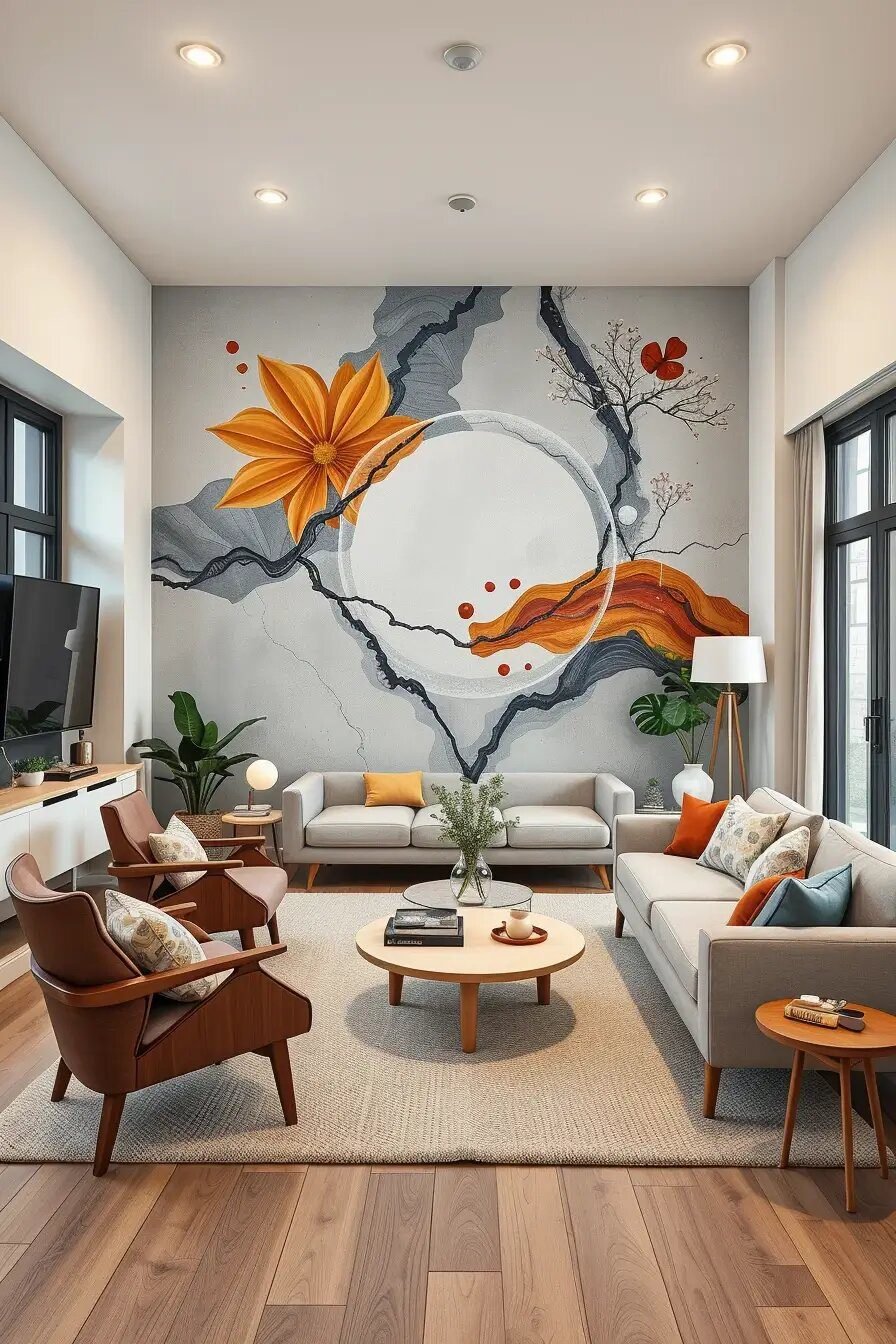
Ever walked into a room and felt pulled toward one particular wall? That’s what a well-designed accent wall mural can do. A DIY themed mural turns a plain space into something that reflects your personality and taste. This article walks you through picking a theme and building a mural that fits your room, whether the goal is a bigger feel, a livelier mood, or a cozier corner. We’ll cover practical steps so the finished wall actually works for daily life, not just photos.
No painting background? That’s fine. A mural is doable once you break the process into small steps, and that’s exactly what we’ll do here. Below you’ll find design ideas, material suggestions, and tips for matching a mural to furniture and existing decor already in the room. The goal is simple: practical advice you can actually use, without the guesswork.
A mural can match almost any mood: calm, energetic, urban, or bright and colorful. With some planning and a few cans of paint, a plain wall becomes the focal point of the whole room. The next sections walk through themes, tools, and techniques so you can pick the right combination for your space.
How to Pick the Right Wall for a Mural
Before starting a DIY mural, find the wall that deserves the attention. A good option is a wall that already draws the eye, ideally one with natural light nearby. Avoid direct sunlight, though, since it fades painted colors over time. A wall with indirect daylight keeps colors looking rich for years instead of washing out.

Large furniture like sectionals or bookcases can crowd a mural, so leave breathing room around the design. Walls near entryways or in open floor plans tend to work best because they catch the eye right away and set the tone for the space. If the wall has doors or windows, plan the design so it wraps around them instead of getting interrupted by them.
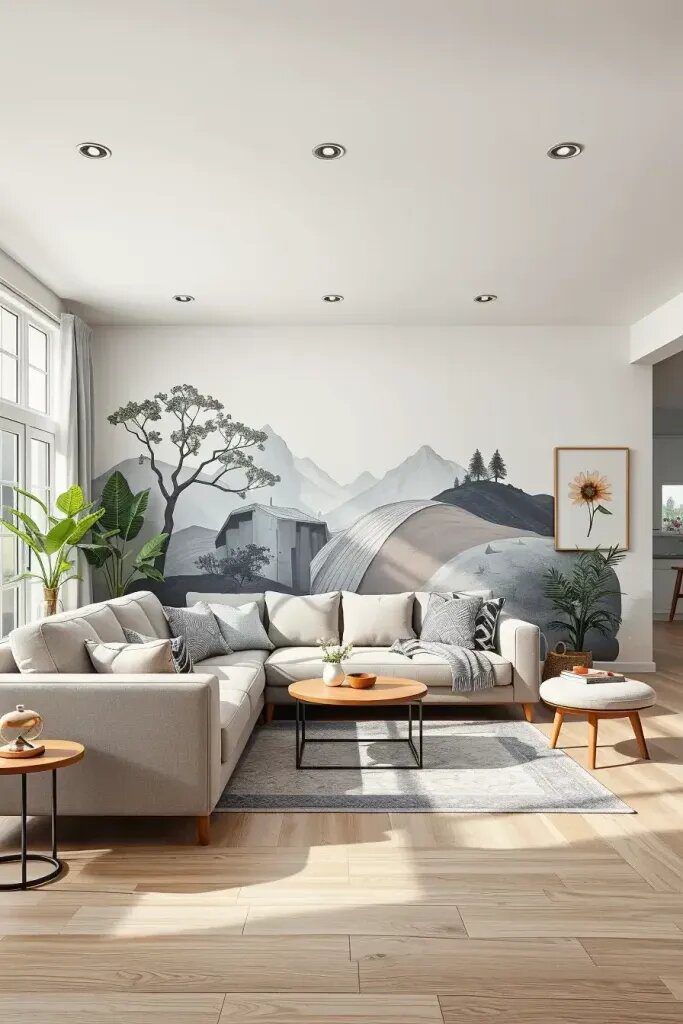
Neutral wall colors, like soft gray, beige, or white, make a strong calm backdrop that lets a mural stand out instead of competing with it. Architectural Digest has noted that too much clutter nearby, such as shelves or extra furniture, pulls attention away from the artwork. Balance matters here: less around the mural usually means more impact from it.
Check how the mural reads from different spots in the house, not just standing directly in front of it. Walk in from a hallway, glance at it from the kitchen, or view it from a doorway to see how it fits the rest of the home. A mural should feel connected to the space around it, not like an isolated painting stuck on one wall.
Supplies Needed for a DIY Wall Mural
Gathering supplies ahead of time makes the entire mural project run smoother. A solid setup includes primer, a range of acrylic paints, several brush sizes, painter’s tape for protecting edges, fabric drop cloths, and a pencil for sketching the layout. For stencil work, spray adhesive and an X-Acto knife make cutting and placement much easier. A ruler or level is also worth keeping nearby to keep lines straight, especially on geometric designs.

Each item on that list earns its place for a specific reason. Painter’s tape isn’t just for clean borders; it also helps map out geometric shapes with sharp edges. Quality brushes make colors look more even, and fast-drying acrylics are ideal for layering one color over another without long wait times. For larger walls, a projector can save hours by outlining the design directly onto the surface.

Starting with decent materials matters more than most beginners expect. HGTV designer Brian Patrick Flynn has recommended using higher-quality paints and tools for DIY murals, since cheaper supplies often lead to uneven coverage or peeling. Spending a little more upfront on brushes and paint usually saves time and frustration later.
Storing supplies in one place keeps a project organized, especially in a house with kids or pets nearby. A rolling cart or a sealed storage box keeps brushes, paints, and tape together and out of reach between painting sessions.
How to Prep a Wall for a DIY Mural
Surface prep comes before any paint touches the wall. Start by washing the area with diluted detergent to remove dirt and oil, then let it dry fully. Check for small holes or rough patches and fill them with spackle if needed. If the existing paint is glossy or very smooth, a light sanding helps the new coat grip the surface instead of sliding off later.

Once the wall is clean and patched, apply a coat of interior primer before any painting begins. Primer evens out the surface, which matters most when covering a dark color or a textured finish. A white or light gray primer base helps bright mural colors show up true instead of muted. Give the primer at least 24 hours to cure before starting the design work.

Skipping prep work is a common early mistake. Designer Emily Henderson has pointed out that prepping a wall matters just as much as the painting itself, since shortcuts here often lead to cracking or peeling down the road. On an early mural, skipping the sanding step meant the paint never bonded properly to the old glossy finish.
Painter’s tape along baseboards and ceiling edges protects those areas while the mural takes shape. It’s a small step that’s easy to skip, but it keeps lines crisp where the wall meets the trim. Murals near ceiling corners or floor edges especially benefit from this extra bit of masking before the first coat goes on.
Freehand Sketching or Stencils for Murals
Choosing between freehand drawing and stencils comes down to personal style and the level of precision needed. Freehand work allows loose, expressive lines and works well for organic shapes like branches or waves. Stencils or projectors suit designs that need exact repetition, like geometric patterns or lettering. Many muralists combine both methods on a single wall, using stencils for structure and freehand touches for texture.

Stencils need spray adhesive or masking tape to stay flat against the wall while paint gets applied. A rough pencil sketch beforehand helps map out spacing and proportions before any stencil goes up. Grid systems are especially useful here, since they let a small sketch on paper scale up accurately to a full wall design.
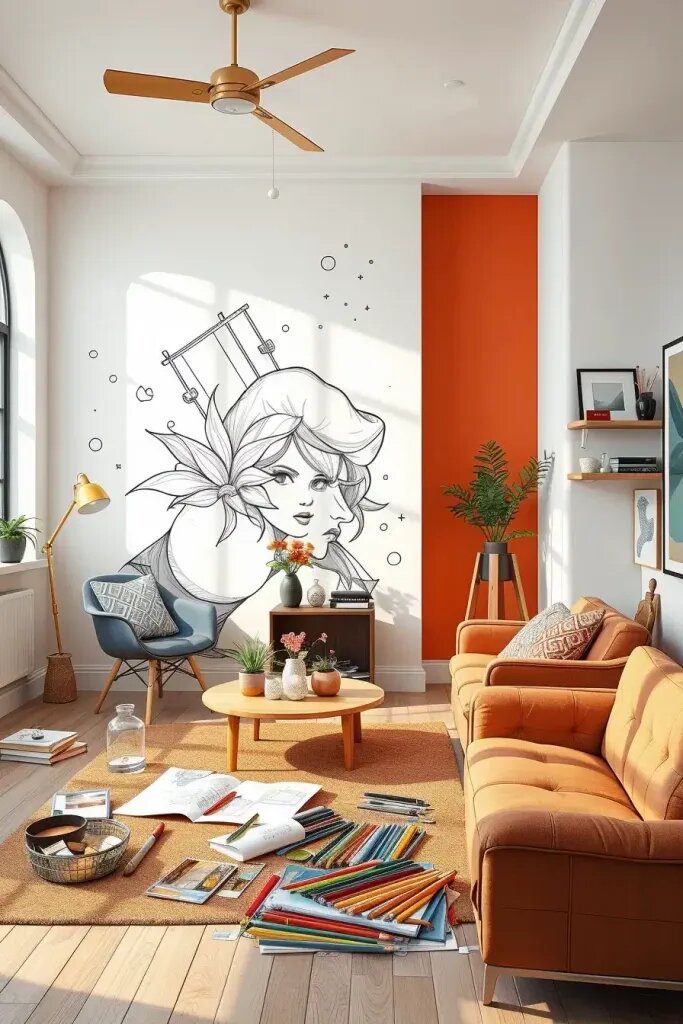
Freehand sketches tend to carry more personality and a sense of motion across the wall. Stencils, on the other hand, save serious time on repeating patterns that would be tedious to draw by hand. Muralist Alli Koch has suggested that first-time muralists tackling a large wall use a tracing projector to keep proportions accurate from the start.
Color-testing gets skipped in a lot of beginner guides, but it matters. Painting a few small swatches directly on the wall shows how a color actually looks in that room’s light. Natural light, lamps, and overhead fixtures all shift how a shade reads, so testing first avoids an expensive repaint later.
Nature-Themed Murals for a Calm Space
Nature murals bring a quiet, grounded feel to a room. Common subjects include bare tree branches, a mountain silhouette, or rolling ocean waves. These designs work especially well in a bedroom, a reading nook, or a bathroom, where a calmer mood matters most. A soft green mural with hazy hills or simple leaf outlines can make a small room feel more open and airy.

Nature murals pair naturally with organic materials like a wooden bed frame, woven storage baskets, and linen curtains. In a living room, an armchair and a textured rug reinforce the same earthy feel. Cushions and bedding in warm neutral or moss tones tend to echo the mural’s palette without competing with it.

One client described feeling surrounded by the outdoors after painting a leafy mural in their home office. For inspiration, artist Shogo Ota’s minimalist nature illustrations use clean, simple lines that avoid feeling busy or overdone. His approach favors restraint over detail, which keeps the final result calm rather than cluttered.
Scent and greenery add another layer to a nature-themed room beyond the painted wall itself. Essential oils or a few real potted plants reinforce the outdoor feel the mural is going for. Good design should engage more than sight alone, and a nature-themed room is a natural place to bring in smell and texture too.
Floral Accent Wall Murals for a Feminine Touch
A floral mural brings an elegant, romantic feel to a room, particularly in a bedroom, powder room, or dressing area. Large peonies, cherry blossoms, or climbing roses in pink, lavender, or deep burgundy add depth and softness to a wall. Spring-blooming flowers like peonies and cherry blossoms are popular subjects since their colors read as fresh and light-filled even indoors.

A tufted headboard paired with a mirrored dresser or a vintage vanity table reinforces the feminine feel started by a floral mural. Soft lighting and a mirror in a delicate glass frame add polish without much extra effort. Floral throw pillows or cushions can pick up a color from the mural without repeating the exact pattern.

A floral mural painted for a client’s daughter noticeably brightened the whole room once finished. Better Homes & Gardens has pointed out that a painted floral design is a low-maintenance alternative for anyone who loves flowers but doesn’t want to keep real ones alive. It’s a fair trade-off for anyone short on time or a green thumb.
Live plants, like a hanging fern or a potted flowering plant, add texture next to a painted floral mural. Mixing real greenery with the painted design keeps the wall from feeling flat or purely decorative. The combination gives the room some dimension that paint alone can’t fully deliver.
Geometric DIY Murals for Modern Wall Art
Geometric murals suit a home office, dining room, or any space that could use a cleaner, more modern look. Triangular patterns, interlocking circles, and bold color-block grids all work well as repeating shapes across a wall. These designs tend to make a room feel more structured and current compared to a solid color or a busy print.

Mid-century modern furniture pairs naturally with a geometric mural, especially pieces with slim wooden legs and brass accents. Bright accent chairs and a monochrome rug help ground the room without pulling focus from the wall itself. Metal track lighting or a pendant fixture nearby adds an art-gallery feel to the whole setup.

A mustard-yellow and navy geometric mural in a home studio ended up tying the whole room together once it went up. Some research suggests geometric patterns can support focus and productivity in a workspace, which explains why so many home offices lean on this style. Walking into that room now feels like a small daily reset before getting to work.
You know what would look really nice on these shelves? Some black or gold floating wall shelves! They not only serve a useful function, but they also tie the mural into the overall geometric theme.
Abstract Wall Murals for Creative Spaces
If you’re trying to add a creative touch to your home, abstract murals are a great way to do it! You don’t have to follow any strict rules with these designs – they can change and evolve freely. I personally love using flowing lines, vibrant colors, and unique shapes to express myself through art. Abstract murals can really bring a modern, artistic vibe to spaces like art studios, loft apartments, or funky living rooms.

When it comes to decorating with abstract murals, I find that keeping things simple and classic really helps tie the whole look together. I like using solid color couches, open bookshelves, and real hardwood floors to create a cohesive and welcoming space. Adding a unique coffee table or some cool pendant lights can add some personality without overwhelming the room. The key is to keep things minimal so the mural remains the focal point.

I just love abstract art because it’s so free and exciting! The designs are all about emotions and changes that happen as you go. Justina Blakeney, a designer I read about in Domino Magazine, said that having abstract art in your home can be like visual therapy. And I totally agree – it’s therapeutic for both the people who look at it and the ones who make it.
I think it would be really cool to add some woven baskets and velvet cushions to this styling idea. It’ll give the room a little extra flair and prevent it from looking too dull. What do you think?
Cityscape Murals for Urban-Style Rooms
Do you love city life? Bringing urban street murals into your home can really capture that city vibe! I usually end up placing these speakers in my studios, under my desk, or off to the side in a hallway. You can choose from views of New York, Tokyo, or Paris in full color or black and white to make the skyline pop. These murals look especially cool when paired with industrial brick and concrete.

I decided to add some small leather cushions, metal bookcases, and desk chairs to complement the mural and create a nice contrast. I wanted to keep the design simple, so I also included some large black floor lamps, subway tiles on the backsplash, and some framed photos. By keeping the room neutral, it really allows the mural to stand out without feeling too cluttered.

So my friend asked me to paint a Chicago skyline mural in her apartment, and let me tell you, it totally transformed her boring wall into a cool and stylish focal point. I read on Apartment Therapy that cityscapes are perfect for people living in rentals or small spaces who want to add some drama without cluttering up the place.
Why not add a large wall clock or a map to your city interior? It really brings the whole room together and adds a cool vibe to the space. Plus, it gives off a cool, cultured feel.
How to Paint a Galaxy Wall Mural
Galaxy murals are just so lovely and great for bringing some inspiration into any bedroom or cozy corner meant for relaxation. My space murals are full of swirling galaxies, tons of stars, and pops of blue and purple with a touch of gold. Having one of these murals in your space can really set the mood for some peaceful thoughts or unwinding after a long day.
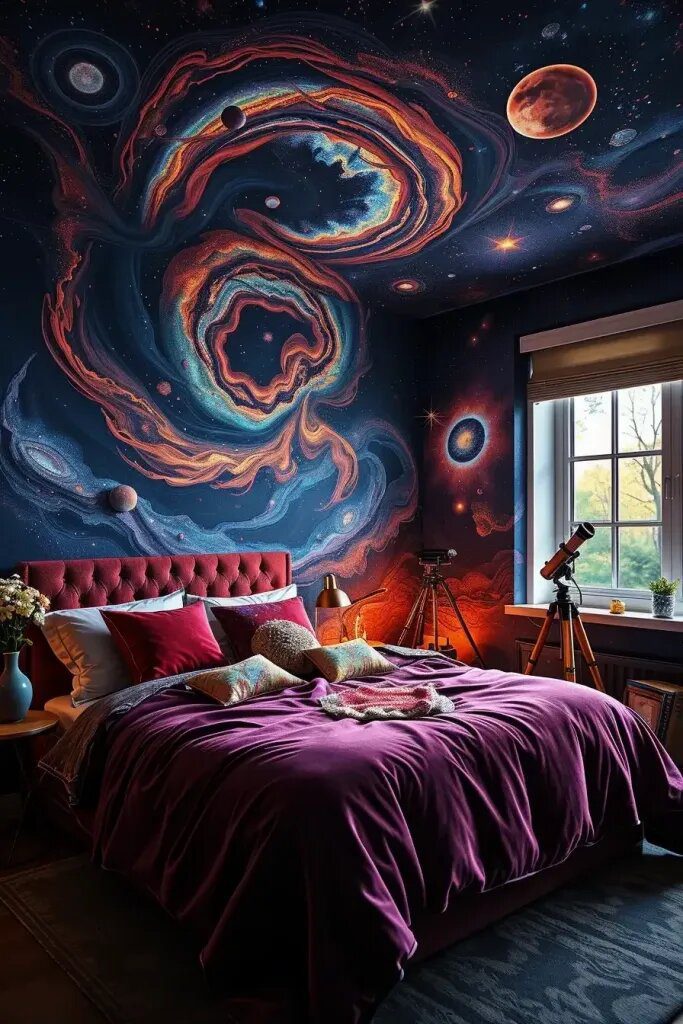
I love creating a cosmic vibe in my space by adding some faux fur throws, velvet cushions, and bean bag chairs. To really make the mural pop, you can use LED star lights or fiber optic ceiling panels for a cool 3D effect. Keep the walls simple with just a few decorations to really highlight the galaxy theme.

Have you heard about teens painting galaxy scenes in their bedrooms and turning them into cool environmental murals? It’s become a popular way for them to unwind and get creative. The Spruce says these celestial-themed rooms are all the rage now because they bring a calm and artistic vibe to the space. How awesome is that?
How about putting a telescope or a cool moon lamp by your bed? It’ll give the room a little extra spacey vibe.
Magical Wall Murals for Kids Bedrooms
I love coming up with fun mural ideas for kids’ rooms! I’ve done underwater scenes with whales, magical forests with fairies, and cute safari animals. These murals really bring the room to life and spark the imagination. They’re perfect to have behind a bed or in a reading nook where you can really appreciate all the details. What do you think about adding a mural like that to your child’s room?

I like to use safe, washable paints when I decorate a room, and I always try to match the decor to a fun theme. For example, if I’m painting an enchanted forest mural, I might add a cool tree-shaped bookcase, cozy mushroom pillows, and soft pastel bedding. I also like to incorporate things like toy blocks on the walls and stuffed animals that can double as toys. It’s all about creating a magical space for kids to enjoy!

A lot of parents have mentioned to me how much fun they have bonding with their kids through painting projects. It’s a great way to spark creativity and have some quality time together. I read in Parents Magazine that using glow-in-the-dark stars and chalkboard paint can keep kids engaged and feeling artistic. Sounds like a cool idea, right?
I believe it’s really important to involve your child in planning our family activities. You’d be surprised at the fun ideas they come up with, and it makes them feel special and involved in making our home a great place to be.
Motivational Quote Murals for Any Room
Isn’t it amazing how a logo from your favorite book can bring such positive vibes to your space every day? I love displaying mine in my home office, it just sets the tone for the day. And how cool would it be to add an inspirational quote to the mix? You can personalize it even more by choosing a font that reflects your personality – go for cursive for a softer touch or bold letters for a more empowering feel. It’s all about creating a space that feels uniquely you!
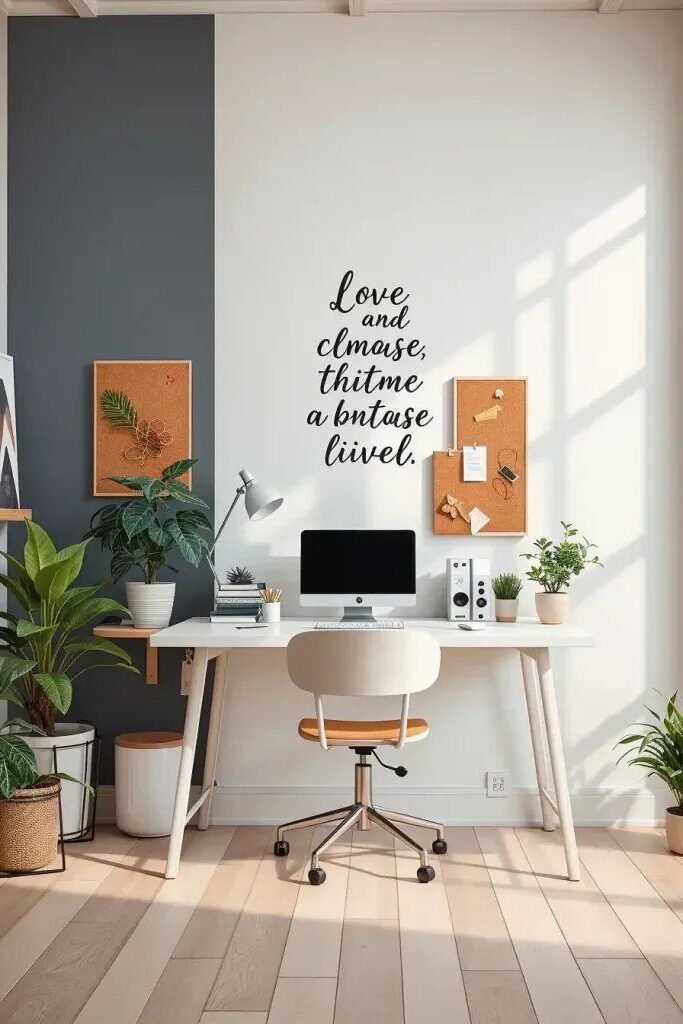
Hey there! When it comes to decorating around a mural, less is more. So why not keep it simple and let the mural do the talking? In modern offices, having a writing desk, a clear chair, and a corkboard or calendar on the wall can really make a difference. And don’t forget to add a few houseplants to liven up the space and give your art a softer touch. Just a few thoughtful touches can really make a space feel cozy and inviting.

So, I decided to paint the phrase “Create Something Every Day” in big, bold letters above my desk in my office. It sets the tone for my day and keeps me inspired. I read in Real Simple that displaying quotes can really personalize a room and help you focus, especially in the most hectic areas of your home.
If you want to give your design some depth, try pairing the quote with a subtle gradient or a simple pattern in the background. It will help make the mural more interesting and not so plain.
Vintage Mural Designs for Nostalgic Decor
Have you seen these amazing murals that look like they’re straight out of a time capsule? They capture the essence of bygone eras like Art Deco and vintage travel posters. I love how they bring a touch of charm to any room, sparking interesting conversations and nostalgia. My go-to colors are mustard yellow, dusty rose, and faded teal, with a bit of distressed detailing for that extra character. It’s all about creating a cozy and inviting atmosphere in your home.
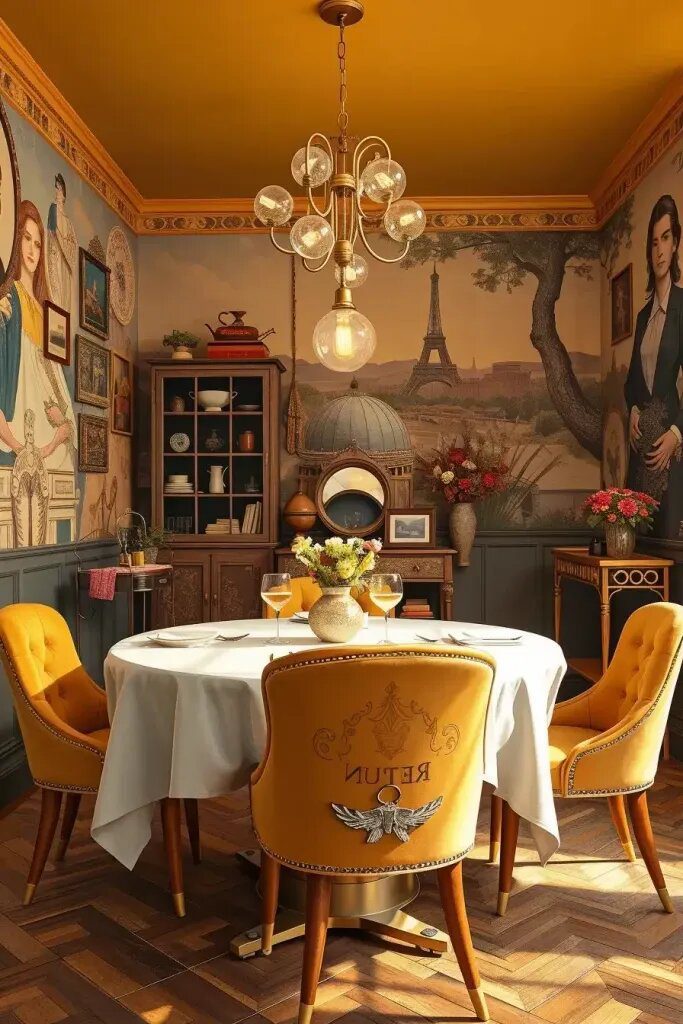
So, when I’m putting a room together, I like to add in some retro touches like cozy velvet armchairs, classy brass bar carts, or charming clawfoot side tables. I also love incorporating vintage elements like Edison bulb lighting and old-school rotary-style clocks to really bring a sense of the past into the space. And to tie it all together, I think having some cool wallpaper or antique frames on the walls surrounding the mural really adds that finishing touch. It’s all about creating a cozy and nostalgic vibe that feels welcoming and unique.
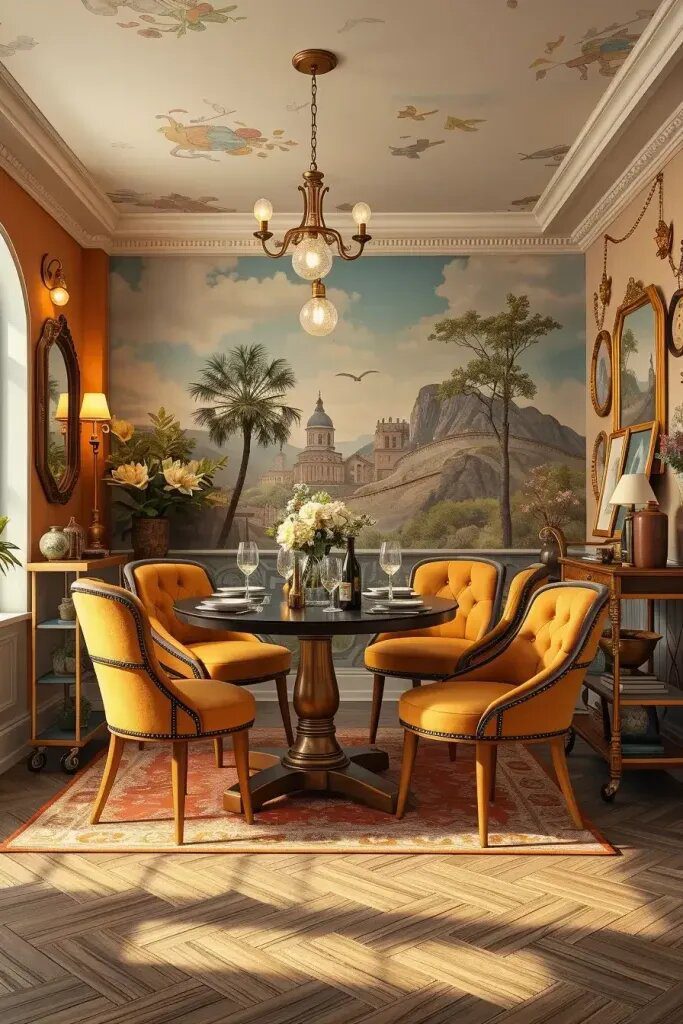
Oh, I recently painted this really cool mural in a music lover’s den! It’s a cozy 1920s jazz club scene that I just love. I read in Home Decor magazine that more and more folks are going for vintage designs these days to make their homes feel super comfy. I totally get that vibe!
If you throw in some vintage record players or vinyl cover frames to your decor, it’ll really amp up the vibes! It’s a nice way to tie in some nostalgic memories and make the painting even more captivating to gaze at.
Ocean-Inspired Murals for a Coastal Feel
Have you ever thought about painting a room with an ocean scene? It can create such a peaceful atmosphere that makes you want to just relax and unwind. I’ve done some artwork with waves and coral reefs in bedrooms and bathrooms, and it always seems to lift the mood of my guests. Using colors like soft blue, foamy white, and a touch of green can really transform a plain room into a little getaway. A mural behind your bed, couch, or tub can also make a bold statement and really tie the whole look together. It’s amazing how a little bit of paint can make such a big difference in how you feel in a space, don’t you think?
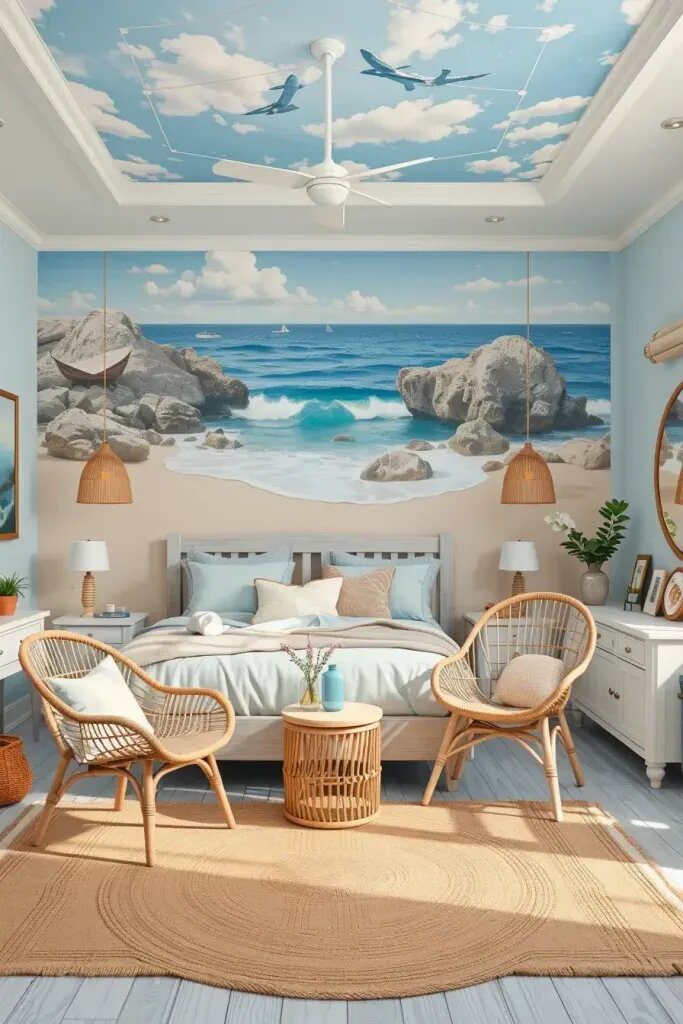
If you want to really capture that beachy vibe in your home, consider adding some rattan or whitewashed furniture pieces like a driftwood coffee table or a sea-themed bedframe. Sprinkle in some woven baskets, glass lanterns, and sandy-toned throws to enhance the coastal feel. Natural light is key, so try to use light-colored walls to help bounce sunlight around the room. And for a fun touch, how about a wave mural on the accent wall to add some visual interest without overwhelming the space?

I always find inspiration in Shea McGee’s designs – they have such a calming coastal vibe that I love. I think the key is to keep things light and soft, with a good mix of colors and materials to make each piece really pop. And if you’re thinking about trying your hand at a mural, maybe start with a sponge or watercolor technique to play it safe. It’s all about finding your own style and having fun with it!
You know what would look really cool in your bathroom? Adding some ambient LED lighting above or below the mural to give it that sunlight effect, especially in rooms that don’t get much natural light. And if you’re feeling fancy, a mirror in a shell frame or some nautical rope details would really tie the whole look together. Just a little suggestion to spruce up your space!
Boho Wall Mural Ideas Worth Trying
Have you ever thought about adding a boho-style mural to your space? It can really bring a calm and artistic vibe to any room! When I create murals, I like to use characters with organic shapes and colors inspired by terracotta. I also focus on designs that are simple and not overly detailed. You can choose images like suns, moons, plants, or even tribal themes. Murals work best in creative places like office nooks, cozy reading spaces, or your bedroom. They can add personality and design without taking up too much space.
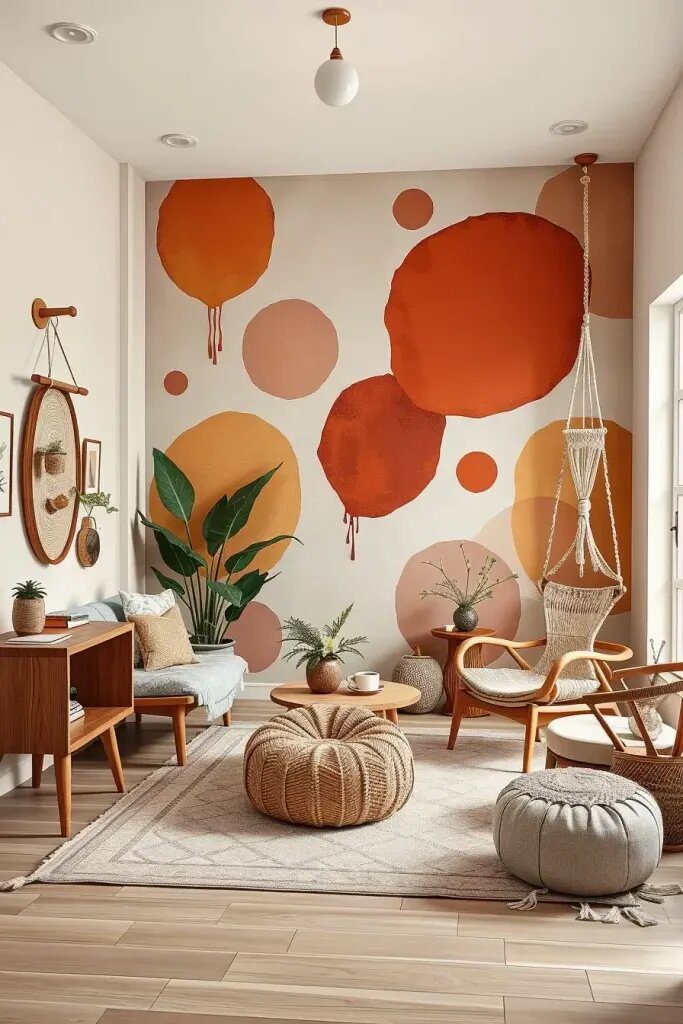
Why not try mixing the mural with some natural wood furniture, macramé decorations, and handwoven rugs? You could also throw in a rattan hanging chair or a leather pouf to cozy up the room a bit. And don’t forget to toss in some clay, mustard, or deep teal accent pillows to tie it all together! When it comes to balancing a mural, neutral walls or simple decorations are your best bet.
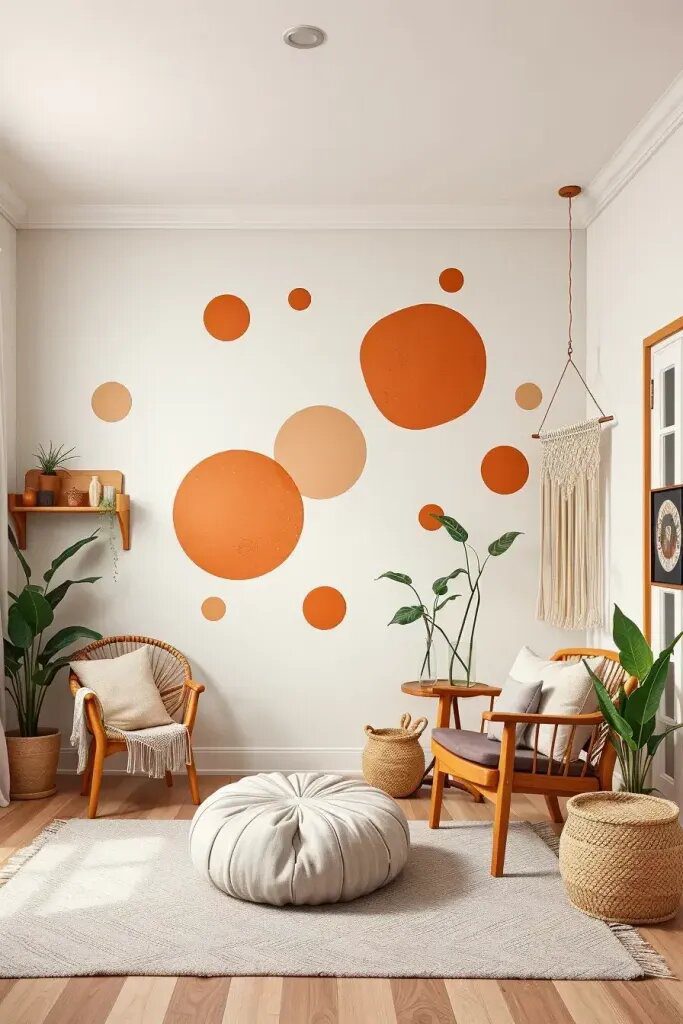
You know, from my time working with wall murals, I’ve learned that it’s totally cool to get a little creative and bend the lines a bit. It can actually add a lot of charm to a boho mural! And hey, the little imperfections just give it a more handmade feel, right? Interior stylist Justina Blakeney always talks about how mixing different patterns and textures is key to the boho style – it’s all about letting your creativity shine and showing off your personal touch.
I think adding some cute little hanging plants or pampas grass in those tall floor vases would really brighten up this space! The cozy texture of the fibers gives off a chill vibe and complements the energy of the mural.
Bold Jungle Murals for a Tropical Accent Wall
I really love adding jungle-themed wall murals to spaces! They bring so much color and greenery, not to mention those cool shadows that really grab your attention. I’ve painted these murals in playrooms and living rooms for people who enjoy bold designs. If you’re looking to showcase trees, vines, and wild creatures, I recommend using deep greens, bright yellow-greens, and browns. These murals really shine in rooms with a maximalist style, where they can truly stand out and make a statement.
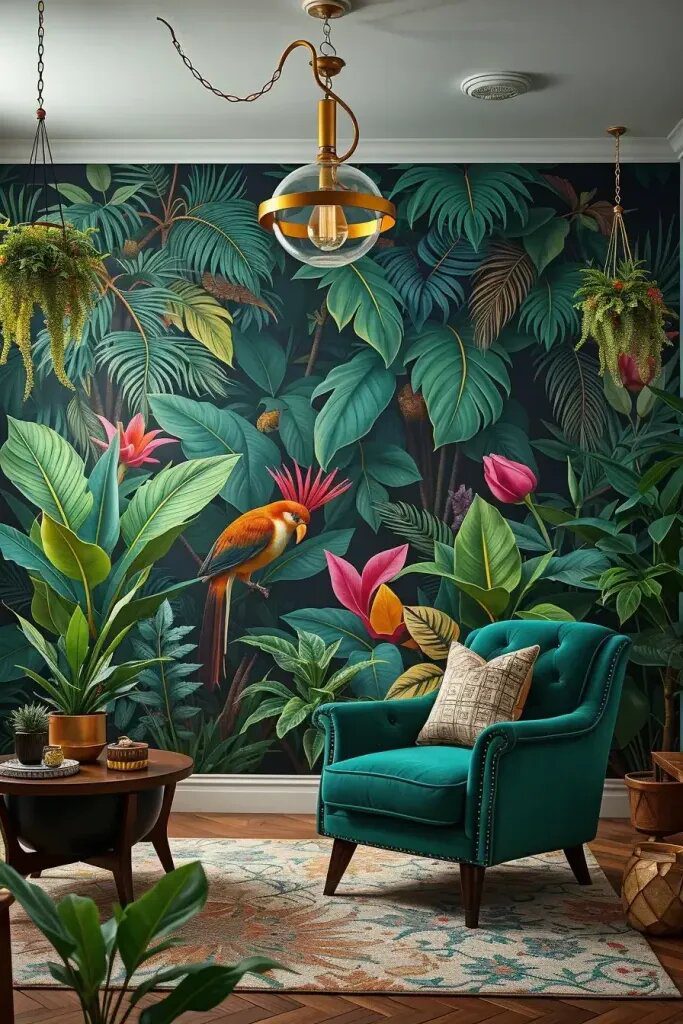
When it comes to creating a jungle-style vibe in your home, don’t be afraid to be adventurous with your furniture choices. How about adding a plush velvet green armchair or a rich, dark stained wood bookshelf to really bring that tropical feel to life? And don’t forget to add some touches of gold or brass for a touch of glam and style.
When it comes to lighting, opt for warm and inviting sources to mimic the gentle sunshine filtering through the jungle canopy. And to truly complete the look, add some potted palms or hanging ferns to help blend your walls seamlessly with your decor. It’s all about creating a cozy and lush atmosphere that feels like you’re wandering through a tropical paradise right in your own home.

I find that using stencils for leaves really helps me get the right sizes without taking forever. I read this tip from Bobby Berk that says to pick one wall to make a bold statement, so the room doesn’t feel too cluttered. It’s a great idea to keep in mind if you’re going for a jungle theme.
If you want to really bring the theme together, you could add some animal print cushions, cute animal statues, and even a cool net roof over your child’s bed! Just a few ideas to make the room feel more wild and adventurous.
Using a Projector to Trace Wall Designs
I love using a projector to transfer the design for my murals – it’s a huge time-saver! This little trick makes it so much easier for me to tackle intricate designs or text. All I do is connect my projector to my laptop or phone, adjust the image just right, and then I can simply trace over it with a pencil before I start painting. It’s a game-changer!

When you’re working on mural projects, it’s really important to have a sturdy table and comfortable chairs that adjust to the right height for you. Whether you prefer painting sitting down or standing up, it’s always a good idea to set up your workspace ergonomically. And don’t forget to place the projector at the correct distance to avoid any weird distortion. Having proper lighting, especially after you’ve done the tracing, is crucial for making sure you can see and paint accurately.

I’ve found that this trick really comes in handy whenever I want to create a balanced look or showcase some cool typography on a wall. According to Architectural Digest, even professional artists and interior designers use this method, so it’s not just for beginners. Just divide the walls into sections using painter’s tape and a level to make sure everything is aligned before you start painting.
Hey there! I think it would be cool to use a collage arrangement for murals, incorporating lots of different images or symbols. That way, the wall can have multiple scenes instead of just one static image. What do you think?
Hand-Painted Murals Versus Peel-And-Stick Wallpaper
So, when it comes to sprucing up your walls, it really just comes down to how you’re feeling, your level of confidence, and your living situation. Personally, I’ve experimented with both painting by hand and using peel-and-stick murals. Painting by hand definitely gives you more creative freedom, but peel-and-stick decals are super convenient and perfect for those who rent or like to switch up their decor often. So, really, it just depends on what works best for you!
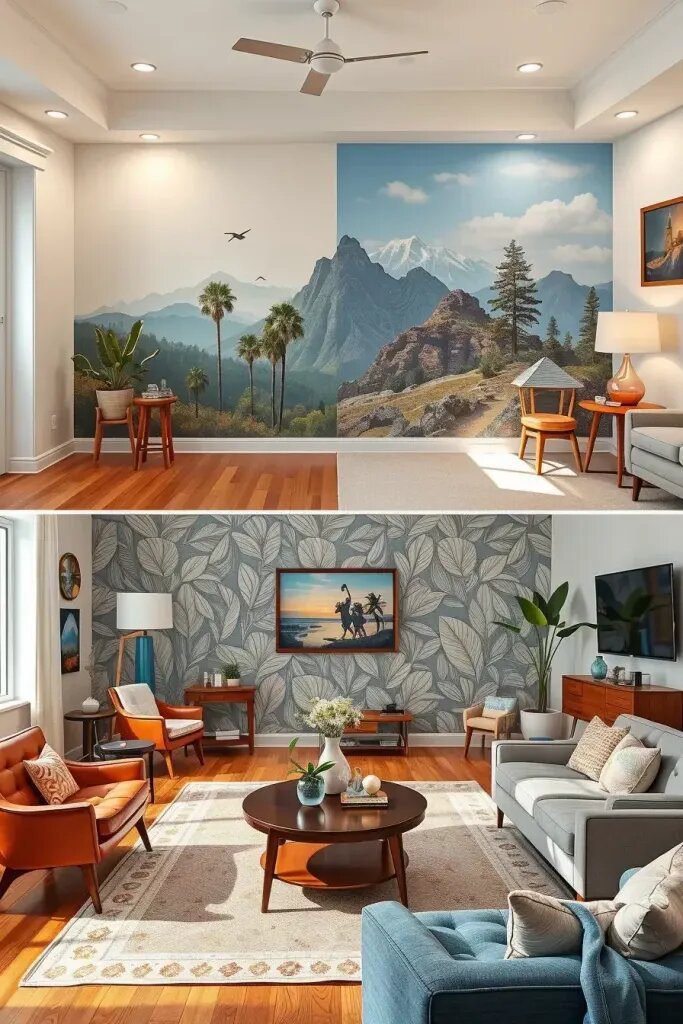
When you’re using peel-and-stick wallpaper, go for a matte finish so it doesn’t end up looking too plastic-y. It looks really nice with some comfy mid-century furniture to show off the cool artwork. Hand-painted murals with depth and movement look super cool with artisan or eclectic decorations.

Hey, did you know that The Spruce muralist recommends mixing styles by starting with paint and adding depth with some temporary stickers? It’s a great way to keep your decor fresh and you can always Google new interior ideas as often as you want.
If there’s anything else you’d like me to include, I can give you a list of some really good decal brands and suggest a few types of paint that work well for creating matte-finish murals.
DIY Mural Ideas for Rental-Friendly Spaces
Hey there! If you have a rental home, you can add some personal flair without breaking any lease agreements by using removable murals or special paint. I’ve tried out a few different methods like putting murals on removable panels, painting on canvases that can be hung like wall art, and even using markers or paint-safe pens to create temporary artwork. Don’t let a plain wall bring you down – there are so many ways to make it pop!

When picking out furniture and decor for your room, think about the mural as inspiration. Try to choose colors that are similar to the ones in the artwork. If you’re going with fabric or stick-on vinyl, go for light and breathable textures to make sure they don’t get damaged or start peeling.

I’ve actually tried out those mural wallpaper panels from Tempaper and they work great, especially for people who are renting. Adding on some fun false eyelashes for a party is so easy – you can put them on and take them off with no hassle. And hey, why not switch up your outfits for each season if you feel like it?

It would be super helpful to have some easy-to-follow directions or templates to help out folks who are new to DIY projects or renting. It can make the process of moving in or out a whole lot easier with just a little bit of guidance.
What Wall Murals Say About Your Mood
Have you ever thought about how certain colors can affect your mood in a room? It’s pretty fascinating stuff! I always keep in mind the feelings different colors can evoke when I’m designing. For example, light blues and greens have a really calming effect, making them perfect for bedrooms and reading nooks. On the other hand, reds and oranges can really spice up a kitchen or gym. And how cute are dark yellows for a kids’ room or hallway? They just give off such a happy vibe!Color psychology is such a cool thing to learn about!
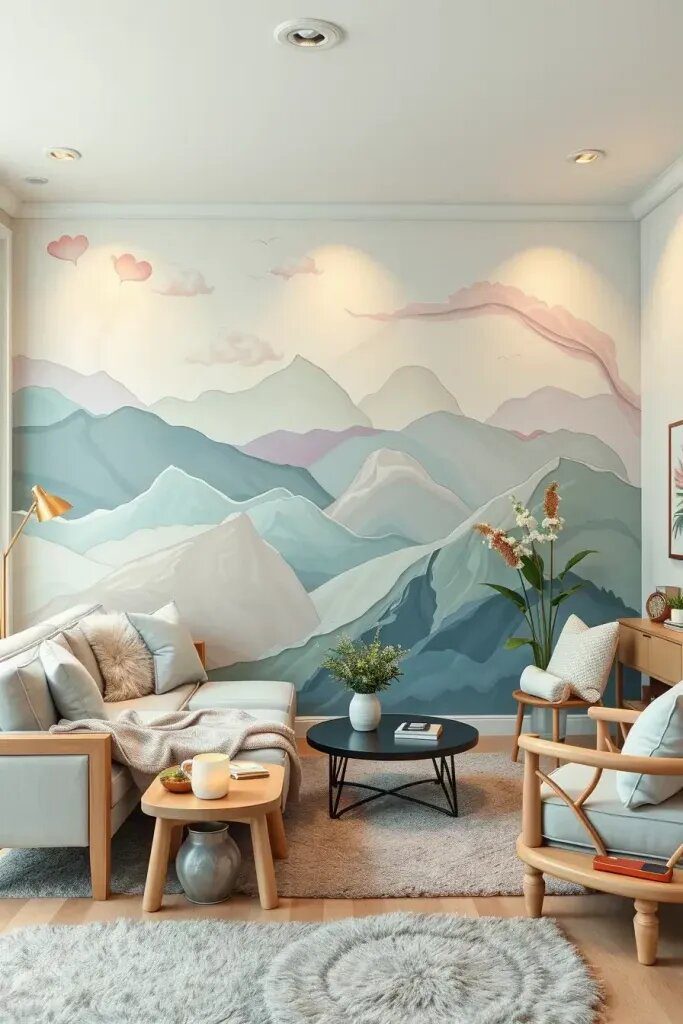
Once you’ve picked out the colors for your room, go for furniture that goes well with your color scheme. If your walls are pastel, consider getting some nice white or light wood furniture to keep things calm and soothing. If you have a lot of colorful decorations, opt for simpler furniture so things don’t get too overwhelming. And don’t forget about curtains or throws – choose colors that complement your mural and add a cozy touch to the room.

I love checking out Benjamin Moore’s color guide for inspiration because they really understand how colors can impact our emotions and surroundings when we’re picking out new shades. It’s so cool when you can give a story and purpose to each color in your mural – it makes it really special and powerful.
Hey there! It would be really helpful to have a color chart or guide in the article that connects common mural themes to the emotions artists want to convey and suggests which colors to use. It would definitely make this section better!
How to Seal and Protect a DIY Mural
So, imagine you’ve poured your heart and soul into creating a beautiful DIY mural, right? The last thing you’d want is for it to fade, peel, or smudge. That’s why it’s super important to seal and protect your masterpiece as the final touch. Personally, I suggest using a clear, matte polyurethane sealer or a high-quality varnish, depending on the kind of finish you’re going for. These products not only make your mural last longer but also help it withstand sunlight and moisture. And if your mural is in a bathroom or kitchen, sealing it is a must-do.
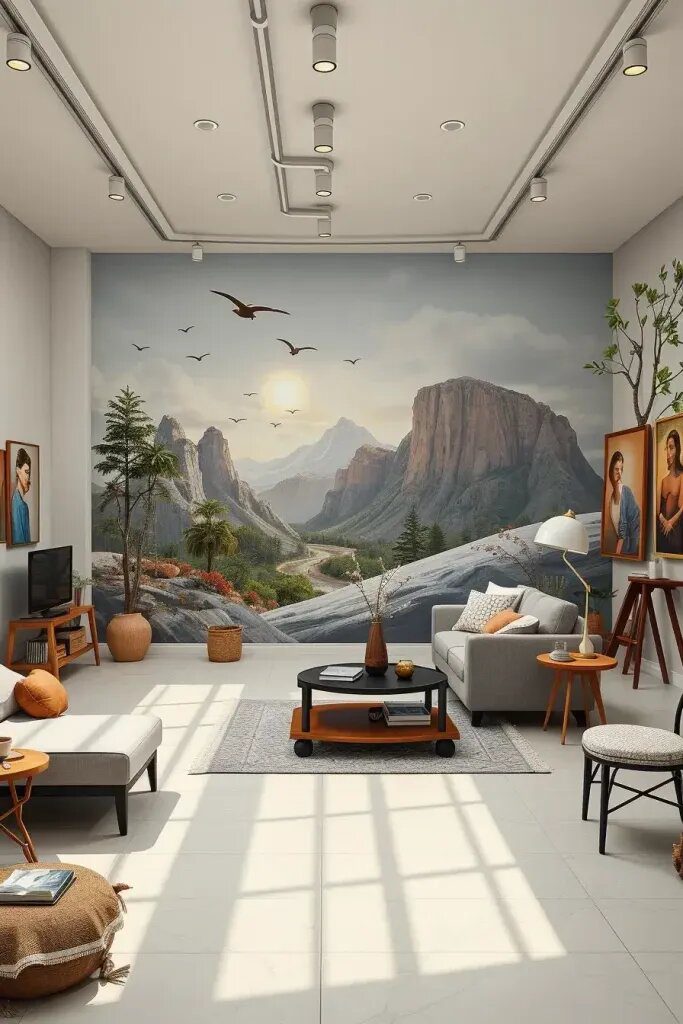
I personally prefer using water-based sealers with latex paint for murals because they won’t alter the color. When it comes to children’s bedrooms, it’s best to choose safe, low-VOC materials. And don’t forget to cover your furniture and floor with plastic before sealing the wood to prevent any accidental spraying or dripping.

So, one thing I learned the hard way is that I didn’t give the sealing process enough time when working on my murals. Better Homes & Gardens suggested letting the mural sit for two days before doing anything else to it. They also recommended starting with a small area when applying the sealer to make sure it doesn’t change the look of your walls. Thanks to this advice, one of my bigger murals maintained its matte finish even after adding sprayed-on text.
I believe it would really enhance this section if we included some specific tips on using brush-on and spray sealers, as well as providing information on how long different types of paint take to dry. What do you think?
Colorful Seasonal Mural Ideas for Any Room
I think it’s a really neat idea to switch up your seasonal murals to keep your space feeling fresh and in tune with the changing seasons. I personally love painting them on panels or canvases because it’s easy to switch them out when the time comes. Whether it’s a bright spring scene with cherry blossoms or a cozy fall vibe with autumn leaves, each mural adds a nice touch of the season without having to redecorate the entire room.

When decorating, it’s a great idea to switch up your furniture and accessories to fit the season. In the summer, you can switch to linen slipcovers for a light and breezy feel. When fall comes around, adding some cozy plaid throws to your sofa creates a warm and inviting atmosphere. And in the winter, swap out your pillows for some snowflake-themed ones for a festive touch. Don’t forget to make your accent wall the highlight of the room by keeping the rest of the decor in soft, neutral colors with seasonal accents sprinkled throughout.

I got this cool idea from watching HGTV – why not divide a mural wall into panels using painter’s tape, each one representing a different season? This way I can paint all the panels at once and then switch them around using my iPad like a rotating art exhibit. It’s such a fun concept, especially for kids’ rooms or sunrooms!
You know what might be helpful? Mentioning how to properly store those extra panels and maybe suggest some tips on how to control displays without leaving any marks on the walls. Just a thought!
Painting a Mural as a Family Project
Have you ever tried painting a mural as a family? It’s a great way to bond while getting creative together! I’ve done it with my nieces and nephews and it always turns into a fun, chaotic adventure. Everyone gets to choose their favorite subject, whether it’s animals, stars, or fairytale castles. And if you have young kids, handprint art or shape pictures are perfect ideas to work on together. Just let your imagination run wild and enjoy the process!

Before you get started, make sure to have some washable droplets, smocks, and different brushes nearby. It’s always a good idea to choose non-toxic, indoor-safe water-based paint. Personally, I like using foam rollers for painting larger areas and fine brushes for those delicate details. Assigning each kid their own section of the wall can help them feel proud of their work and prevent any overlapping issues.

When you keep things organized, writing becomes a breeze. Start by laying out the whole space and dividing it into sections. Martha Stewart suggests practicing your designs on paper first and keeping a reference image handy as you work. This helps young participants feel more confident and stay focused.
You know what would be really cool? If you took some photos or even filmed a time-lapse of yourself working on the mural. It would be a great way to capture and remember the memories of the family, especially when it’s time for a fresh coat of paint.
Mural Ideas for Small Rooms and Studios
You know, even in small spaces, you can really make a statement with bold decorations like murals. I’ve seen some cool studio apartments and cozy nooks decked out with them. Personally, when my space is limited, I tend to go for simpler, more stylish designs. I like to avoid anything that might overwhelm the area. But if you choose a mural for behind your bed or along a narrow hallway, you not only get some art but also add some architectural flair to your place. It’s a win-win!

When setting up your room with a mural, make sure everything you place in there has a purpose. Consider using space-saving furniture like foldaway desks, cool floating shelves, or mirrored closet doors to really enhance the mural’s effect. In my designs, I often incorporate vertical lines and curved shapes to create a sense of height in the room. To keep the space looking clean and uncluttered, stick to a simple color scheme for the rest of the room.

If you have a small space, it’s best to stick with simple, large designs instead of intricate patterns. Apartment Therapy suggests that gradient murals are the way to go, and I couldn’t agree more! You’ll achieve a beautiful look with minimal effort.
I think a good idea would be to go for some simple panels that can be like little works of art and also function as room dividers. They’re perfect for adding some separation in a studio apartment without completely blocking everything out.
Playful Retro and Pop Art Mural Ideas
I love the idea of having a retro or pop art mural in your home! It’s a great way to add your own personal touch and style. There’s something so fun about filling a wall with bold colors, fun designs, and playful comic art. These murals really shine when you’re chilling out in a media room or just unwinding in a cozy lounge.

When it comes to decorating, you might want to consider going for a mid-century modern or minimalist vibe with furniture in cool tones like beige, blue, or gray. Eames chairs and hairpin-leg tables can really tie the look together nicely. To add a vintage feel, opt for either vintage lightbulbs or neon signs. And don’t forget to add some bright and cheerful rugs and cushions to complement the patterns on your walls!
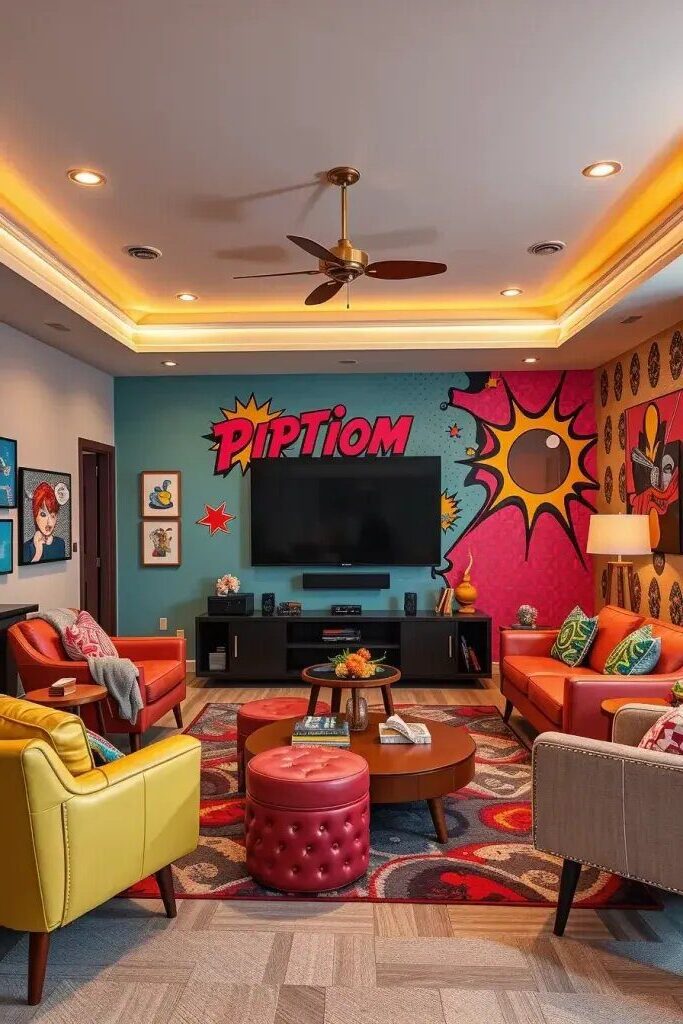
So, while we were sprucing up a client’s loft, we decided to jazz up one wall with a cool Roy Lichtenstein-inspired mural, keeping the rest of the space nice and simplistic. The pop of contrasting colors really gave it that artsy gallery vibe. Elle Decor actually says that incorporating bold colors that play off each other and repeating patterns are key to nailing that pop art feel in your own space. Cool, right?
If you throw in a couple of pop art prints that match each other across from one another, it’ll really tie the room together without going overboard.
Adding Shine and Texture to DIY Wall Art
I love using metallics and textures to enhance my murals! Whether it’s gold leaf, reflective colors, or joint compound, it really brings out the depth and light in my work. You’ll especially see how this technique shines in spaces like the dining room or entryway, where a little element of surprise can really make a statement.

If you want your walls’ artwork to really pop, try using simple and modern furniture to complement it. Add in some cool metal-framed mirrors, warm brass lighting, or cozy velvet fabrics to complete the vibe. Keep everything else in the room minimal so that the mural is the main attraction. Love the focus on art in your space!
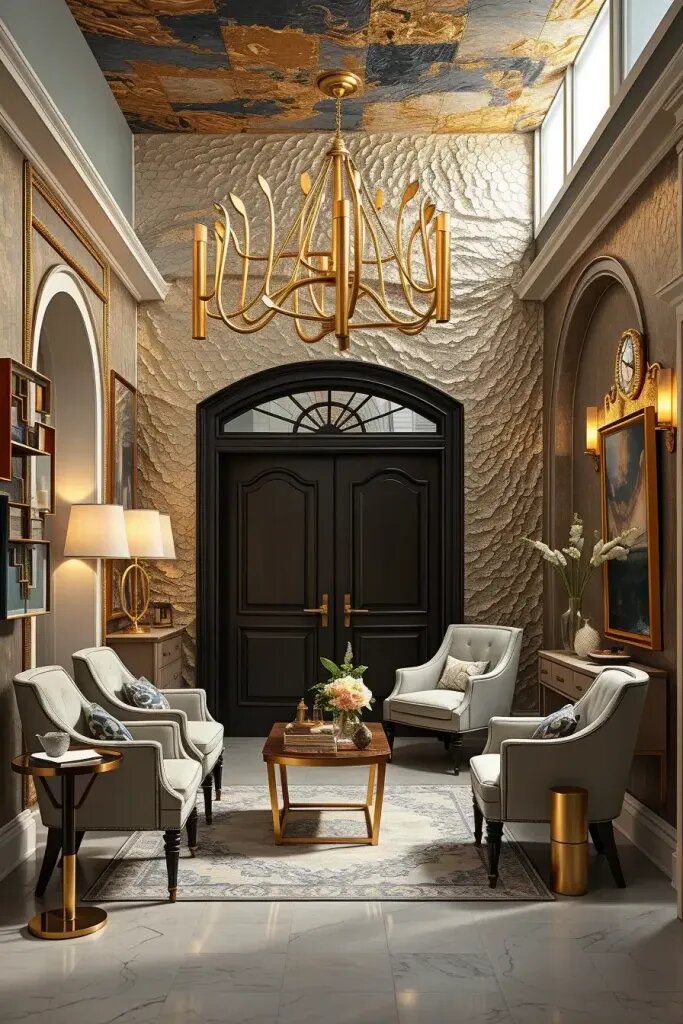
I was watching a tutorial on House Beautiful and it hit me that texture doesn’t always have to be obvious. You can achieve a plaster-like look with gentle brushstrokes or sponging without having to rough up the surface. Adding some metallics and rich jewel tones like sapphire or emerald can really elevate any outfit and give it a more sophisticated vibe. Pretty cool, right?
Hey there! If you want to add some cool textures to your work without making it too bulky or heavy, you should try using palette knives and metallic spray paints. They work like a charm!
Step-By-Step Mural Guide for Beginners
If you’ve never tried doing a wall mural, it can feel a little intimidating at first. That’s totally normal! My suggestion for beginners is to start off with a clear plan in mind. Think about what theme and colors would work best in your room and reflect your personal style. Once you’ve got that figured out, sketch out your ideas either on paper or on your computer. I personally like using tracing paper to play around with layouts and Procreate is a great tool for creating detailed designs. Just take it step by step and you’ll see how fun and rewarding it can be to create your own mural!

Once you’ve figured out your plan, grab all your painting supplies like primer, paints, brushes, painter’s tape, drop cloths, and any stencils you want to use. Start by washing the wall, then apply a coat of primer and lightly sketch out your design. Use painter’s tape to create clean edges or protect other areas. Begin by painting the top section of the wall, allowing it to dry before moving on to the middle and bottom parts. Just take it one step at a time and enjoy the process!
You know, I’ve found that it’s super important to step back and take a good look at your finished work every now and then to see how you’re progressing. I read in Better Homes & Gardens that consistent lighting while painting can really make a difference in ensuring your colors are on point. And don’t forget to test out your color swatches on the wall before making any final decisions!
Hey, I was thinking it would be really helpful to include a downloadable checklist for all the stuff you’ll need and prepare before starting a mural. It would have been a lifesaver for me when I did my first one!
Designing Custom Murals to Match Your Decor
When I’m choosing a mural, I always consider the design style of the room first. I think it’s important for the mural to seamlessly blend in with the space, not just be stuck on as an afterthought. For example, if you have a Scandinavian vibe going on, opting for soft artwork like murals or nature photographs can create a serene atmosphere. On the other hand, if you’re into a bohemian look, bold and colorful patterns would be a great match. It’s all about making sure the mural and your furniture complement each other to create a cohesive look.

Hey there! If you’re looking to spruce up your modern minimalist living room, consider adding a mural with simple geometric or abstract shapes. Colors like gray, beige, or pale blue would work really well with this style. Pair it with a subtle sofa, a mid-century sideboard, and a monotone rug for a cohesive look.
For a beachy vibe in your seaside space, an ocean-themed watercolor mural would be perfect. Add some rattan chairs, linen drapes, and whitewashed furniture to complete the look.
If you’re going for a more classic feel, a mural of an old map or botanical design could really enhance the atmosphere of the room while maintaining its style. Just some ideas to help you make your space feel more unique and personalized!
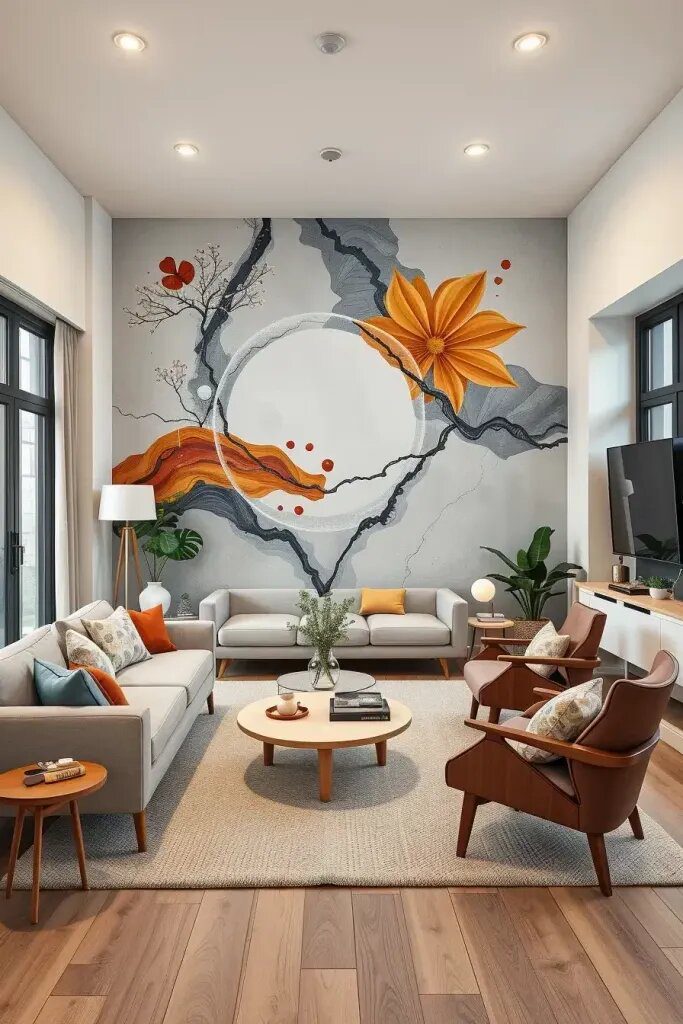
I’ve found that it’s really key for artwork to match the vibe of the room it’s in. Soft colors and gentle lines can create a soothing vibe in bedrooms and nurseries, while bold colors and funky patterns can inspire creativity in your workspace or art studio. I’ve noticed that Apartment Therapy often suggests matching your room’s mural to its function, like using mountain designs for a cozy bedroom. It’s a detail that has always stuck with me.
I think it would be a great idea to suggest to readers that they check out paint companies that offer everything needed for murals. A lot of these companies are now focusing on home interior styles, so they could be a great resource for anyone wanting to improve this section.
How to Fix Mural Mistakes and Start Fresh
Hey, if you’re working on a DIY mural and you mess up, don’t worry! It happens to everyone. I always tell new artists not to stress if things don’t turn out perfectly. If the paint looks uneven or the colors don’t quite match, you can always fix it. Just let the area dry, lightly sand it down, and add another coat of primer before continuing. This way, any mistakes from the first layer won’t show through in your final masterpiece.
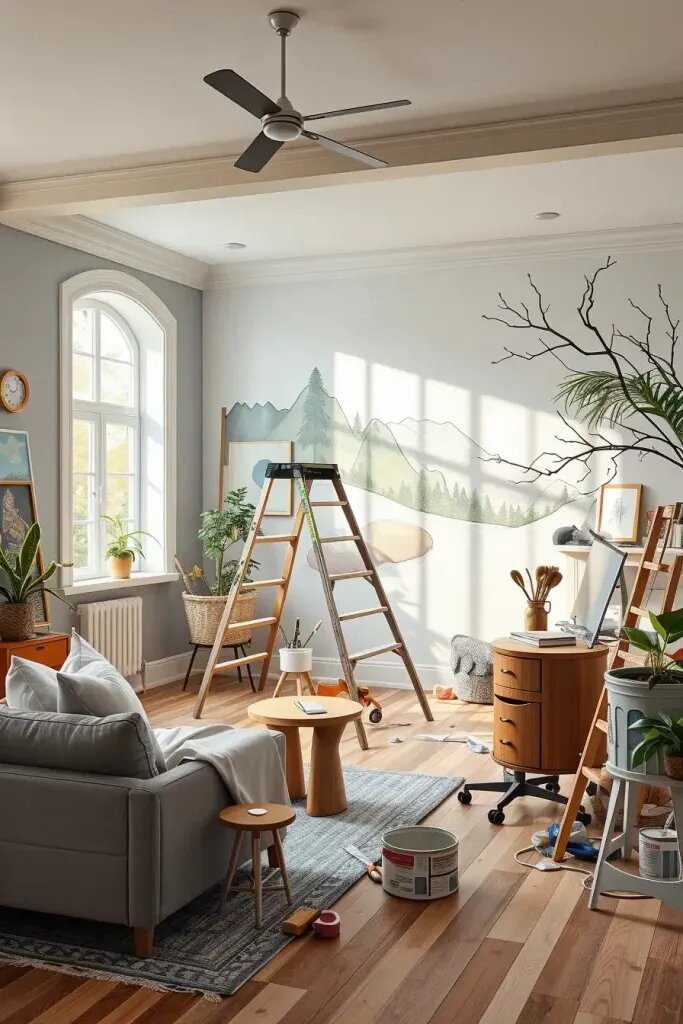
I always make sure to have matte primer on hand, as well as a few shades of base paint like eggshell white or dove gray. They’re versatile colors that go with pretty much any wall. And don’t forget the large roller for big surfaces and small brushes for touch-ups. Keeping masking tape and edge cords nearby is a must for fixing any mistakes or changes when painting just a part of your mural. Let me tell you, this toolkit has been a lifesaver for me more than once!
So, one time I attempted to create a mountain mural in my living room, but in the end, it just looked a bit too cartoonish for my liking. I took a step back, re-evaluated my color choices, and ended up going for cooler tones that resembled twilight. The end result was a lot more detailed and really complemented my dark wood furniture. I recently watched some designers on HGTV who recommended taking on mural projects gradually, adding small details as you go to make sure everything comes together nicely. I’ve found that this method really does work best!
You know what I think would be really cool? If we shared some pictures of murals before and after they got a fresh update. I think it’s important for readers to see that change is possible, even after mistakes have been made.
Where to Find Free Mural Stencils and Templates
Hey there! If you’re looking to get into mural painting, using a good stencil or template can really help, especially if you’re just starting out. I often like to recommend checking out websites like Pinterest, The Spruce, and Block Posters for easy-to-use grids and projectors to help enlarge your designs. These sites make it super easy to print out multiple sheets to create your mural. Happy painting!

Oh, I had so much fun decorating my kids’ rooms! I found some cute leaf stencils for free on a craft blog and decided to re-create them in different shades of green all over the walls. And when it came to creating space-themed designs, it was a breeze! I just downloaded some outlines and traced them onto the walls using tracing paper. You could also use a projector to help get the proportions right. It saved me so much time and made the whole process a lot easier. My kids absolutely love their new rooms!

I personally think stencils are great for walls with a bumpy texture because trying to draw straight lines by hand would be a challenge. When I use a stencil, I always make sure to press it down securely and then carefully paint over it with a dry brush or sponge. I read on the Martha Stewart Living website that reusable mylar stencils are the way to go. You can wash them and use them over and over again for cool designs like polka dots, Moroccan tiles, or waves without worrying about them fading.
I think it would be really helpful to include a PDF stencil pack at the end of this section. It would totally complement the message we’re trying to convey in this article.
Final Thoughts on Bringing Your Home to Life with DIY Murals
I love DIY murals because they’re a great way to add a personal touch to your home! It’s amazing how art can transform a plain wall into a story that reflects nature, shapes, travel, or even your wildest imagination. Plus, creating a mural can be really relaxing, boost your confidence, and it doesn’t have to break the bank. With some planning and a bit of time, practically anyone can paint their own mural, no matter their art background. Give it a try and see how it can liven up your space!

When I design a room, I really pay attention to making sure everything works together – like coordinating colors, lighting, and furniture. For example, in my reading corner, I painted a cool sunburst pattern on the wall and added a cozy mustard armchair, some oak bookshelves that aren’t stuck to the wall, and some fancy brass sconces. I love to try new things, and because of that, my little reading nook has become one of the coolest spots in my house!

I read this interesting article in Architectural Digest that talked about how murals can really make your home feel cozier, and I totally see it. It’s not just about adding decorations but showing off your personality, like those cool lowrider cars that tell you a bit about the person behind the wheel. If you’re feeling overwhelmed, just take things one step at a time until you get the hang of it. You might be surprised to find that it’s a lot more rewarding than you expected.
It would be great to add some testimonials from homeowners who have tried their hand at mural painting. Hearing real stories from people who have actually done it can really inspire others who may be hesitant to give it a go.
Have you ever thought about sprucing up a space with a DIY mural? It’s a great way to add a pop of personality and creativity to any room by jazzing up a plain old wall. Whether you’re trying out a new art style, fixing up a previous project, or experimenting with stencils, the whole process can be so fulfilling. Have you given it a shot before or maybe you have a cool idea you’re itching to try out? Feel free to share your thoughts and experiences in the comments – we’re all ears and would love to hear all about how you’ve made your home uniquely yours!